Pavers: Care & Installation
Handling & Unwrapping
Product should remain wrapped and sealed ready to be installed. It is ideal to have your Quantum Stone Product installed within two weeks of delivery to site. If the installation is delayed, ensure it is stored in a place on site that is not exposed to the weather, any form of moisture or extreme temperatures. Returns and claims must be within 14 days of delivery and prior to installation.
Check Your Product
As soon as your Quantum Stone product is delivered, check for any obvious signs of damage. Notify us of any concerns by phone (08) 83078400. Once the product is unpacked and prior to installion, if you or your landscaper/installer has any concerns about the appearance of the product, halt the installation, take photographic evidence of the issue and phone Quantum Stone to discuss. It is far more difficult to rectify any issues following installation. If evidence of the damage or problem cannot be provided either in photographic format or by returning the damaged product, Quantum Stone will not be held responsible for the replacement of the product.
Installation of the Product
Quantum Stone strongly recommends installation by a licensed experienced tradesman. Installation must be to Australian standards.
When cutting use a brick saw or grinder with a diamond blade. Be sure to clean off any slurry and or dust immediately as staining can occur. Quantum Stone should never be installed on base or bedding sand that contains salt. Doing so will void manufacturers warranty.
Allow a tolerance of – + 5mm, which an acceptable standard within the industry.
It is a requirement adhere to standard OH&S procedures in regards to appropriate clothing and footwear. The following precautions are a recommended requirement when cutting:
- Cutting needs to take place in an adequately ventilated area
- Use dust proof goggles
- Wear cotton or leather gloves
- The use of a Class P1 (particulate) mask is recommended
- Clean up dust particles using a vacuum device or wet down before sweeping to prevent generating airborne dust
Blending
The product contains natural materials some Quantum Stone pavers may have some colour & texture variation. If the order consists of more than one pallet, the pavers must be blended during installation.
Gap Sand (PaveLok & PaveSet etc)
Do NOT use gap sand when there is wet weather forecast.
Stacking
Your product may be required to be double handled and re-stacked prior to installation. If this is the case re stack them on a pallet in the same format they arrived. If not restacking on a pallet, as a minimum, the product should be placed on an even stable surface, with the foam still in between each layer of product. Once restacked, the product should be fully rewrapped to avoid differential drying. Never criss-cross stack pavers as this may lead to hydration marks. (See image).
Incorrect Paver Stacking.
Cleaning & Sealing
Quantum Stone recommends sealing. After the product has been installed allow 3-4 weeks dry warm weather before sealing. Sealing and up keep of sealer will help to protect the product and reduce the risk of stains. Cleaning and sealing contractors are recommended DO NOT USE ACID TO CLEAN QUANTUM STONE.
Contact Quantum Stone for suitable products. ANTI EFF can be used for cleaning.
For everyday stains and marks – hot water and a scrubbing brush or vinegar are recommended.
Efflorescence
Quantum Stone have very few problems with efflorescence, however it is an inherent problem within the clay and masonry industry. It is more likely to show in darker colours / charcoal. As it is a natural occurring phenomenon and is beyond our control. No guarantee will be given. Quantum Stone cannot be held responsible for it. Industry studies show that efflorescence will in time break down, however it can take up to three years.
Guarantee
Quantum Stone guarantee product only. Any defects, faults or problems must be reported within 14 days from delivery and before installation. Inspect product before laying and if in doubt do not install, call Quantum Stone. Quantum Stone will not be liable for lift and relay under any circumstances. It is the responsibility of the purchaser and subsequently the installer to check you a completely satisfied with the product BEFORE INSTALLATION.
Failure to comply with any of our recommendations may void warranty.
Paving Installation Guidelines
Standard Patio Paver Guide:
- Use a good rubble base such as white quarry rubble approximately 75mm deep and compact well
- Follow with a quartz sand of approximately 30mm depth and level to prepare for paving (do not compact)
- Lay the pavers
- Use silicone sweeping sand such as Paveset or similar mix if wanted. Ensure all the sand is swept off the pavers into gaps. and following instructions for the product used, water in and leave to set
Driveway Guide Using 60mm Pavers:
- Use a good rubble base such as white quarry rubble approximately 150mm deep for a 60mm paver and compact well
- Follow with a quartz sand of nominally 25mm depth and level to prepare for paving
- Lay the pavers
- Use silicone sweeping sand such as Paveset or similar mix if wanted. Ensure all the sand is swept off the pavers into gaps and following instructions for the product used, water and leave to set
This information is to be used as a guideline only. Quantum Stone will not accept liability for the use of this Guide or it’s interpretation. Quantum Stone recommends the use of a professional paver / installer.
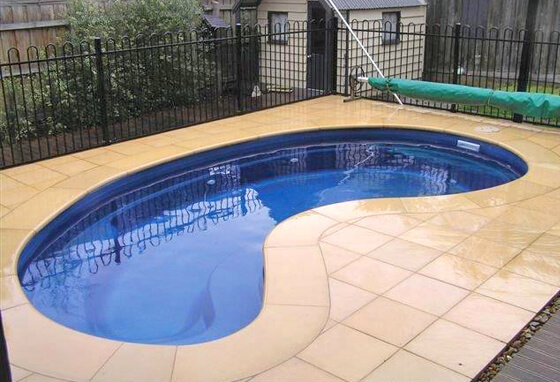
Pool Coping Installation Guidelines
- Run string lines around the pool perimeter for height level and straightness – allow for approximately 20mm mortar bed.
- The fibreglass/concrete “beam” needs to be painted with a watery mix of a Acrylic based bonding agent such as Raybond.
- For application to fibreglass pools, apply 3 beads of Emerseal PU 40 (manufactured by Parchem). Do not apply mortar mix to the fibreglass. Mortar mix needs to be applied to the concrete beam only.
- Mix 3 parts plasterers sand (1/2 red, 1/2 yellow) to 1 part Brighton Lite cement and 1 part Paveloc sand mix with clean water to a cake mixture consistency. Add a liquid “waterproofer” according to manufacturers instructions then bed onto the pool beam.
- Paint the bonding agent onto the base of the pool coping piece.
- Sprinkle 50:50 (in powder form) of Chemgrip Super (flexible pool tile adhesive with waterproofing qualities): and Brighton Lite Cement on to the bed.
- Splash two handfuls of water onto the powdered mortar bed.
- Place the pool coping down evenly, then tap level. 30mm overhang is standard.
- The mortar will squash out and some will fall into the pool.
- The “holes” between the pool and coping need to be filled. Rub your thumb along the join to ensure there are no “holes”.
- Continually wipe clean with a sponge. Do not wipe the mortar as you will wash the cement away from the sand.
- Fill join between the copers with a wide joint of flexible grout.
Flush joins are recommended (not grooved).
Every 3 rd or 4 th join (between the pool coping pieces) should be prepared with Sikaflex Pro or Ardex SE Silicon. This allows for movement and flexes.
A flexible joint needs to be applied parallel to the pool coping if a solid structure is in close proximity eg a wall or house. This will prevent cracking or movement of the pool coping.
This information is to be used as a guideline only. Quantum Stone will not accept liability for the use of this Guide or it’s interpretation. Quantum Stone recommends the use of a professional paver/installer.
Footing Sizes
The following are recommended engineered footing sizes.
- If the wall is in a high wind area, on a boundary, sloping site etc an engineers report or council approval or soil samples may need to be done.
- Block sizes – 500w x 350h x 200d
- Capper sizes – 1000 long x 260d x 50 thick
Wall Requirements
1 block 100mm rubble footing
2 blocks 250 x 250 footing, 1 x Y10 rod
3 blocks 350 x 350 footing, 2 x Y10 rod
4 blocks 400 x 450deep footing, 2 x Y12 top, 2 x Y12 bottom
5-7 blocks 400 x 600deep footing, 3 x Y12 top, 3 x Y12 bottom
All walls are to be capped
- If retaining soil – use drainage behind wall & corefill entire wall
- Every 2m bring 1 vertical Y16 up through the blocks and corefill over the rod
- 50mm of concrete coverage over all rods required
- Mortar mix – 3 golden grove plasterers sand to 1 Brighton lite cement
Note: These footing sizes are only a guide. Each installation should be engineered and all legalities and approvals must be undertaken if applicable. Quantum Stone takes no responsibility or liability in regard to these footing sizes being used and indemnifies itself of the same.
Safety Data Information
Quantum Stone products meet Australian Standards for slip resistance. For CSIRO documents relating to testing results of our products conducted in December 2015, Please contact our office.
Weights lists, footing sizes for block walls and pillars are all available.
Quantum Stone offers superior strength and durability.